Grow your houseplant collection without spending more money. We’ll show you three simple techniques for propagating the plants you already have.
Propagating plants can feel like an intimidating prospect. There’s the fear of damaging or killing your otherwise healthy plant. And not getting any new baby plants from the time and effort you spend propagating can feel like a downer too. But plant propagation doesn’t have to be difficult, as you’ll soon find out.

What is plant propagation?
Propagation is the process of growing baby plants using a plant you already have. Many of the most common houseplants are asexual, meaning all the cells the plant needs for creating a reproduction of itself can be found in the stems, leaves, or roots. This makes propagation even easier. By taking part of the plant and nurturing it you could soon have two, three, or a dozen baby plants on the go. And all from your original parent plant.
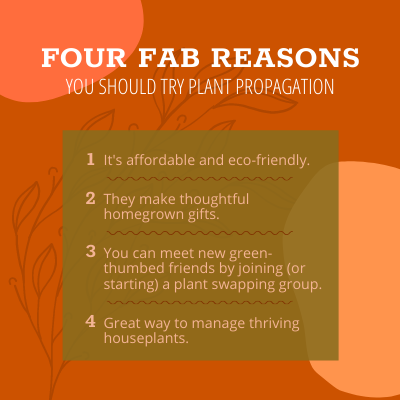
Four fab reasons you should try plant propagation
- It’s an affordable and eco-friendly way to fill your house with more of the plants you love, rather than having to buy more from the store or nursery.
- By cultivating baby plants from your parent plant you’ll always have a thrifty, thoughtful homegrown gift for friends, family, and colleagues.
- You can meet new green-thumbed friends by joining (or starting) a plant swapping group. Trade the plants you’ve propagated for the baby plants others in the group have grown.
- It’s a great way to manage thriving houseplants as it stops them from getting too big or looking overgrown.

Signs you should propagate your plants
The best candidates for propagation are plants that are healthy and thriving. If you can see a baby plant has already formed, or that roots are coming through the bottom of the pot, your parent plant is prime for propagation (and a bigger home to accommodate its growth).
Before taking cuttings or separating the root system, you should prepare the plant for propagation by giving it a good watering a day or two before. And consider the season. Spring and summer months are the best time for propagation as the plants are more active, which increases propagation success.
The three easiest ways to propagate plants
You can propagate plants in different ways, and some methods are easier than others. Which method is best depends on the size and type of plant, as well as whether it’s planted indoors or outdoors. As this is a beginner’s guide to plant propagation for houseplants, we’ll focus on the three easiest ways to multiply indoor plants.
Leaf cutting
Great for succulents and Sansevieria (aka, snake plants), this form of propagation involves growing baby plants from one of the parent plant’s leaves.
How to do it: Pick out a healthy looking leaf, and twist or cut off the leaf as close to the stem as possible. Leave the leaf in a warm, dry area out of direct sunlight for a few days so it can ‘scab’ over (more on this later). While not essential, you can also dip the leaf in a rooting hormone or natural honey to stimulate root growth.
Stem cutting
Use the stem cutting method to propagate plants such as Pothos, spider plants, and lavender, as well as dracaenas, poinsettia, and rubber plants. Doing this successfully means understanding a bit of plant anatomy so you know where to cut, because once you snip you can’t go back.
How to do it: For trailing plants such as Pothos, look for a strong stem. Lots of leaves and signs of new shoots are good indicators. Use a sharp pair of scissors or secateurs to cut close to a node (the nobbly areas where a new leaf, branch, or bud will appear). Remove any leaves close to the node, leaving growth further along the stem for photosynthesis. Dip the stem in a root hormone or honey, then place it in a small pot full of potting mix. The roots should start to develop and take in 2–4 weeks depending on the plant type.
Or for something a bit different
Rather than putting your cutting in potting mix, you can propagate plants in water. Follow the same steps when it comes to cutting the stem and adding root hormones, but then place it in a shallow vase of room-temperature water. Keep the water fresh and clean. Once the roots are an inch or two long, transfer the cutting into the potting mix.
Root division
You need a delicate hand and space for making a mess for this propagation technique. As the name suggests, root division involves splitting the parent plant into smaller plants by separating the root system.
How to do it: Set down some newspaper, a towel, or an old bedsheet. Next, take the parent plant out of its pot and carefully knock off the dirt around the roots. Once the roots are visible, tease them out and break the plant and its root system into smaller root balls. Each baby plant should have roots so you can instantly pot them into fresh potting mix. Keep the soil moist and the plant out of direct sunlight until the roots settle into their new home.
Propagating in water
So far we’ve talked about potting the baby plants in soil. But if you’ve spent any time browsing Instagram or Pinterest for inspiring plant ideas then you’ll have seen the trend for growing plants in water and displayed chemistry glassware. This is actually a really simple form of propagation, and works well for bamboo, pothos, and Monstera (the Swiss cheese plant).

When propagating in water, follow the steps for stem cuttings. Fill the container you’re using with room-temperature tap water, changing it at least once a week to keep it fresh. Roots should start to grow within a couple of weeks. You can then either keep growing the plant in water or transfer it into potting mix. If you choose to keep cultivating the baby plant in water, bear in mind that it probably won’t be as strong because water isn’t as nutritious as soil.
Quick propagation glossary for popular houseplants
Use this quick glossary for guidance on which propagation method is likely to work best for your houseplant.
| Plant | Best propagation method | Extra propagation tips |
|---|---|---|
| Succulent | Leaf or stem cutting | Allow the leaf or stem to callous (scab) before placing it on top of potting mix. |
| Pothos | Stem cutting or root division | Cut your stems 4–6 inches in length. Color variation may not match the parent plant, as this depends on light and growing conditions. |
| Peace Lilly | Root division | Use scissors or a gardening knife to divide the roots of large, established plants into however many smaller plants you want. |
| Snake Plant | Leaf cutting | Roots will grow from the lowest part of the leaf, as it was in the pot. Mark the lower end of the leaf after cutting by creating a notch in the base. |
| ZZ Plant | Stem cutting | Cut as close to the base as possible. Water propagation works well for ZZ Plants. |
| Bamboo | Stem cutting | Once cut, it can be potted into soil straight away. |
| Aglaonema | Stem cutting or root division | If stem cutting, look for new growth close to the top/center of the plant. Place the potted cutting in indirect sunlight. |
| Bromeliad | Stem division | Look for bromeliad pups (the baby plants) when the mother plant is in flower. Use a sharp knife or scissors to make a clean cut between the pup and mother plant. |
Step-by-step guide for propagating succulents
Succulents are one of the easiest plants to propagate. So if you want a (mostly) fail-safe plant to use when experimenting with propagation, succulents are your best bet. Here’s how to do it.
Step 1: Cut a leaf or behead at the stem
Cut or twist off the leaves you want to propagate from the parent plant. Leaves closer to the top of the plant are fresher and healthier. Alternatively, behead the succulent entirely by cutting at the stem using sharp scissors or secateurs.
Step 2: Leave to air dry
Place the leaves or stems somewhere dry and out of direct sunlight so they can callous. This takes 3–4 days, but you won’t see any new root growth for around three weeks.
Step 3: Watch for roots and plant
Once you see roots coming from the succulent leaves or stems, it’s time to plant those babies. Place them in a pot of succulent-friendly potting mix (soil, sand, and gravel for drainage). You don’t have to bury the roots. If the mixture is moist, the roots of the succulent will find their own way down there and bed in.
| Read our full guide on how to plant succulents in a pot.
Step 4: Water and watch
With your propagated succulents in their new homes, the roots should start to bed in around 2–3 weeks. You can check this by gently tugging on the plant. During that time, make sure the potting mix is kept moist and keep them out of direct sunlight until those roots have properly settled. Once they have, they can join their parent in the full gaze of the sun.
Propagating plants requires patience
Knowing how to confidently propagate your plants using the root division, leaf cutting, or stem cutting techniques is just part of the battle. The other part is patience. Depending on the type of plant you’re propagating, it can take weeks for signs of success. Don’t lose heart. Keep a careful eye on your plant babies, ensuring they’re out of direct light and the potting mixture is kept moist, and in time they’ll reward you with the signs of growth you’ve been looking for. The benefits of having a free supply of houseplants for you, friends, and family to enjoy are always worth the wait.
Need a parent plant to get your propagation experiments started? Take a look at our plant section. Pothos or succulents are the easiest to begin with. And don’t forget the extra posts you’ll need to house your plant babies. Grab some eco-friendly pots while you’re at it to make sure you don’t run out.
 Order by Noon for Same Day Flower Delivery